Hey Guys! Today I want to discuss about the power of Release Management, which is a part of Microsoft Visual Studio Team Services, and how easy it is to setup Continuous Integration and Continuous deployment for your web application. CI/CD is an integral part of todays DevOps/Agile world, and Release Management Online does all the heavy lifting for you.
Note: Visual Studio Online (VSO) is the old name of Visual Studio Team Services(VSTS) , and both the terms will be used interchangeably in this blog. Release Management Online is a feature of VSTS which handles DevOps components like integration, deployment, etc.
Before we get into the tutorial, i want to express what DevOps means to me, since different professionals in the industry have a different perceptions of it. DevOps according to me is a culture. You dont “learn” it; you mold you mindset to embrace it. At its core, it is a means to deliver value to your customer much more quickly and frequently, with a high quality solution, based of feedback from the users themselves (feedback here means application telemetry and not focus group studies). DevOps is not a set of processes, tools, way of collaboration or automation. It is all of those things! I will write a different blog post around DevOps in the future, but lets focus on CI/CD now.
Continuous Integration refers to integrating code changes to you codebase frequently and ensuring the correctness of it by verifying that it doesn’t break the build, and your test automation (unit tests) pass without any issues. Other criteria may include limit on styleCop/fxCop issues. A gated check-in should be in place in case these criteria are not met and should disallow the changeset from being checked in.
Continuous Delivery is (somewhat) a superset of CI, in the sense that your application is integrated as well as deployed. This involves a lot of automaton as there may be changes in the infrastructure on which the application is hosted. Obviously, if the build fails, the deployment is not triggered. The test automation here may include System testing as well (e.g. CodedUI or Sellenium) besides the unit testing. Checks like StyleCop and FXCop may not be neccesary here.
Both CI and CD ensure that the entire application development is not hinder due to one bad commit/check in (which happens more often than not in big and complex applications). It also provides a much faster feedback loop to the development team than the traditional ALM methodology.
Now that we have the basics clear, lets get started on the tutorial. We’ll start by creating a Free VSTS account. We will then add an ASP .NET project to the source control and setup Build and Release for it. Finally, we will see it in action and check out the minor tweaks you can make to customize it to your needs. Continuous testing is out of scope for this tutorial but will be coming soon.
Creating a free VSO account
Follow the steps below to sign up for VSTS. The free account has a free quota on few services including 5 users, 240 build minutes, 20,000 Virtual user minutes for load test, etc. above which the pricing can be found here.
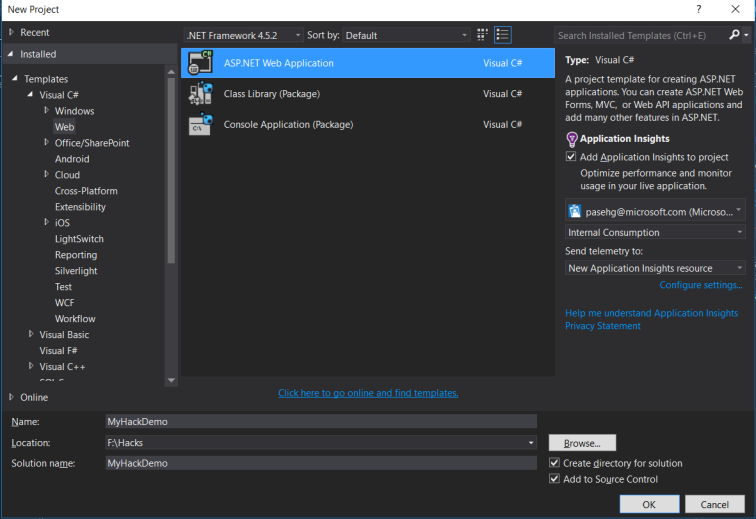
- Sign in to Visual Studio Team Services with your Microsoft account.If you’re a Visual Studio subscriber and get Visual Studio Team Services as a benefit, use the Microsoft account associated with your subscription.

- Name your Visual Studio Team Services account. Choose Git or Team Foundation as your version control.

- Confirm your account’s location. Team Services will create and name your first team project “MyFirstProject”, using Agile as the default process to organize your work.

- After Visual Studio Team Services creates your account and team project, add code, work items, or users.
 Yes, it was that simple! Now that you VSO is setup, lets add some code.
Adding ASP .NET project to source control
Most of you would probably already know how to add a solution to source control, but as this is a Prerequisite to setting up our Build and Release, i have given step by step instructions for it. Feel free to skip this part of the tutorial and use your own web application instead of the one described below.
- If you haven’t already, install Visual Studio 2015. VSTS will also work with older version of visual studio ( as old as VS 2008).
- From your team project page in your Visual Studio Team Services account, open Visual Studio.

- Sign in to Visual Studio Team Services from Visual Studio.
- In Visual Studio, open Team Explorer and Open Source Control.
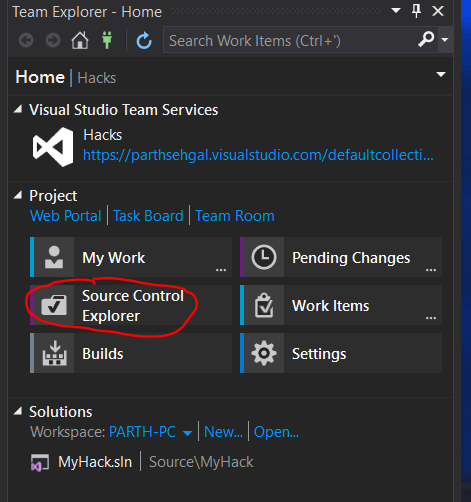
- Click on “Local Path: Not mapped”.

- Select the path to where you would like to store your source code, i.e. map you repository to.
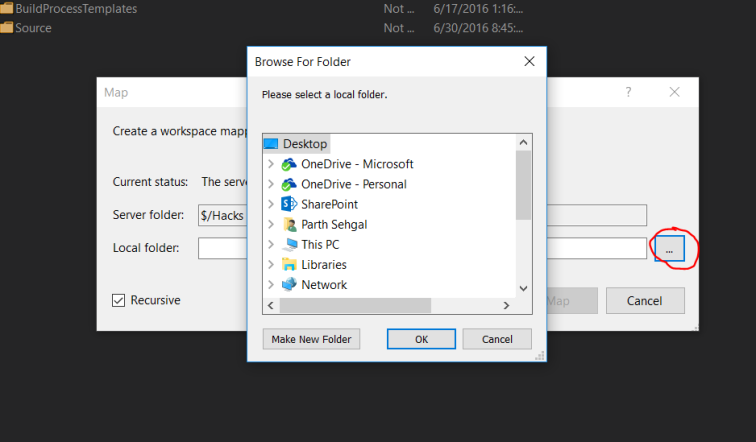
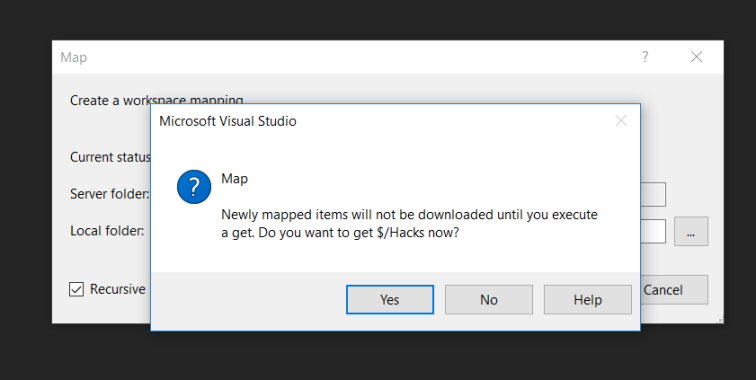
- A dialog box will come up asking if you would like to map the source code repository. Click yes.
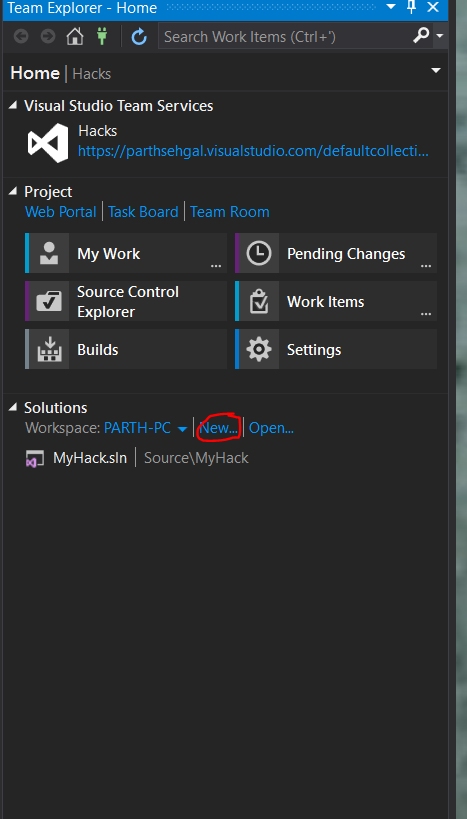
- On the Team explorer pane, click on New under Solutions tab.
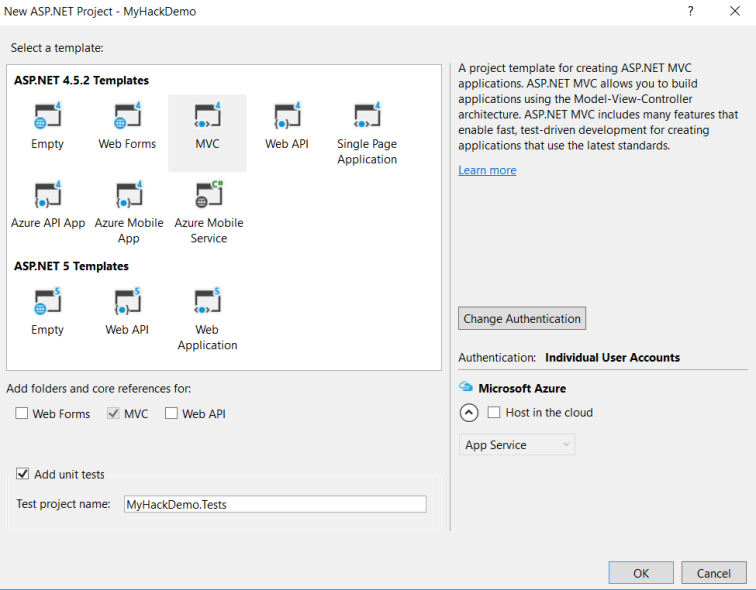
- Add an ASP .NET solution as shown below and select MVC template. Also tick the Unit test checkbox.
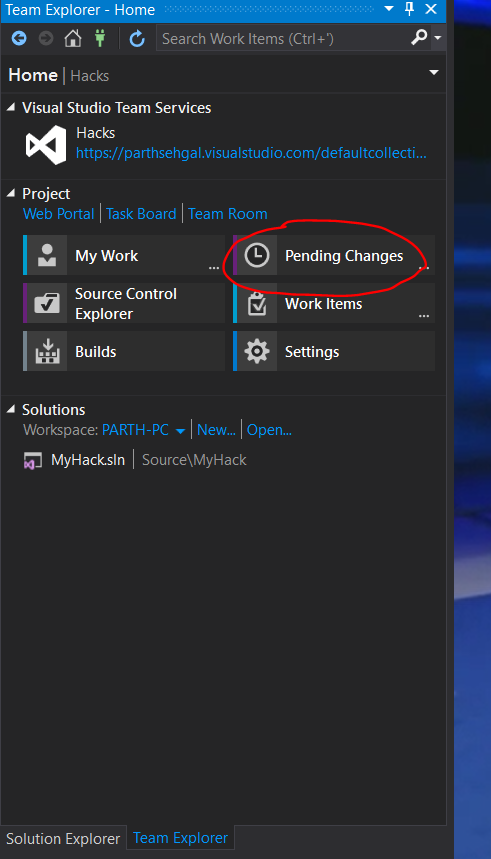
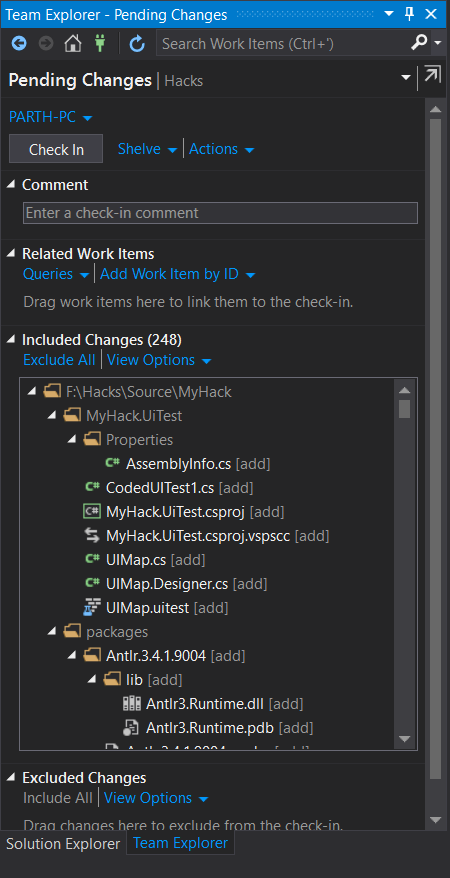
- Now that you have added you project and code in your local environment, time to check it in. It might be a good idea to build your solution before checking it in. Click on the “Pending changes” button in the team explorer pane, verify your changes and click check in.
Your source code is now checked in to you repository and is ready to be built and deployed.
Setting up the Build
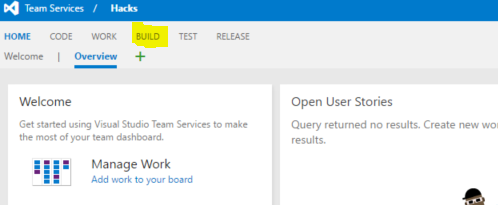
- Navigate to you Team Project and click on “build” on the top navigation menu.
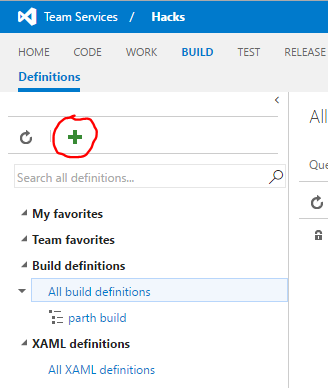
- Click on the “+” to create a new build definition.
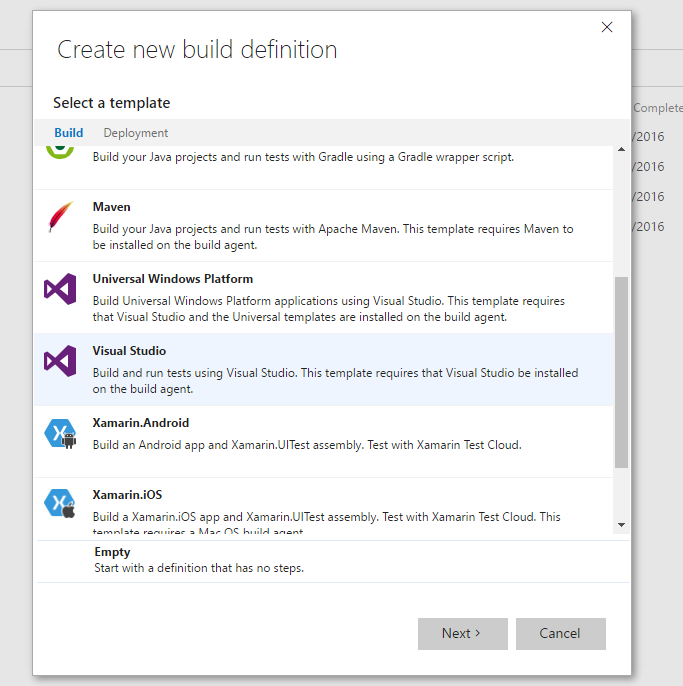
- Select the Visual Studio template.
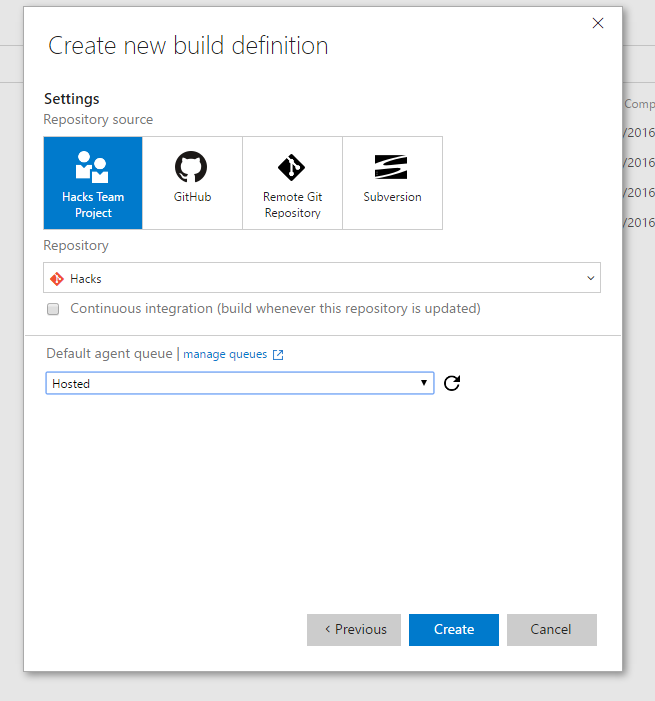
- Select your repository source and select “Hosted” as the agent queue. Click on Create.
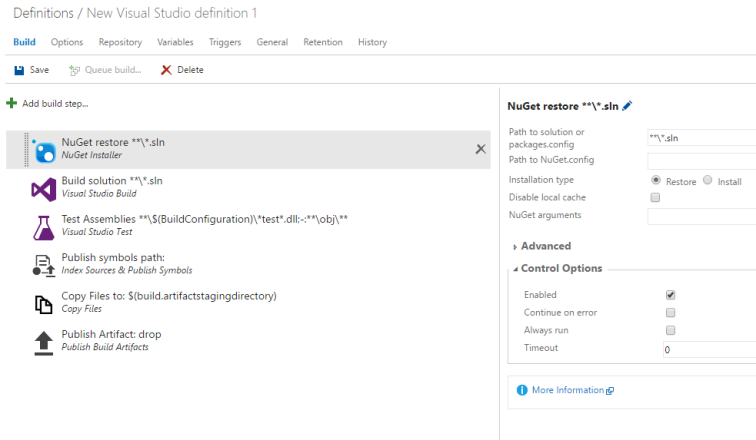
- This is how your build process looks like. It has multiple steps, each performing a particular task in the deployment process.
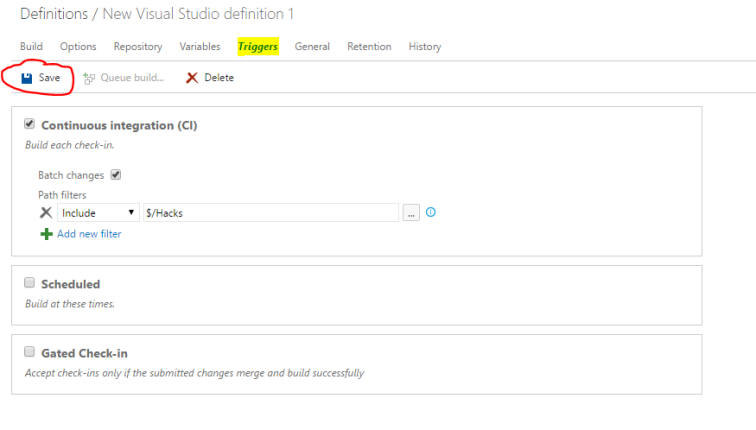
- Click on the Triggers section. On this screen you can configure what triggers the build. We want our build to trigger every time our code checks in, so tick the “Continuous Integration (CI)” check box. Finally click on Save.
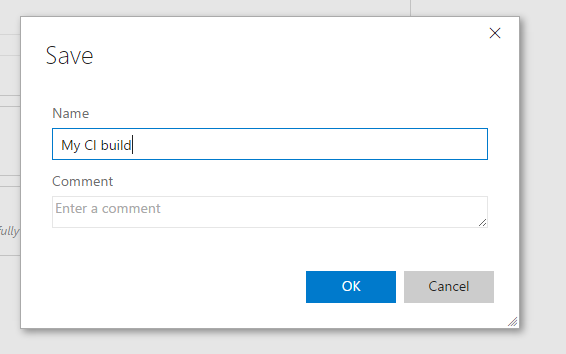
- Name your build and click ok.
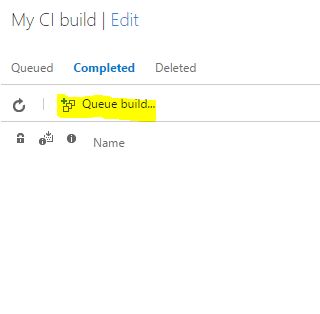
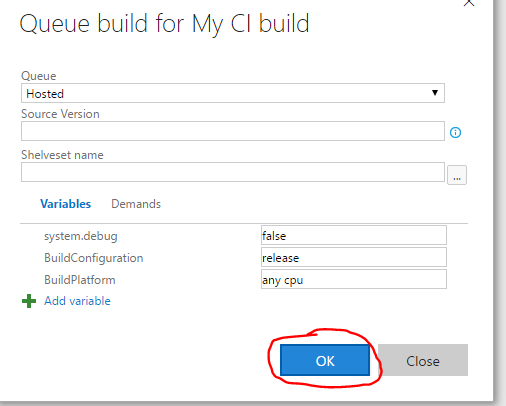
- Now click on the Builds to see all the builds that have been completed. Since you just create the build, it will not have any builds. Go ahead and trigger a new build by clicking “Queue Build…”. A dialog windows pops up. Click Ok.
- The build in now triggered and you can double click on is to see the progress.
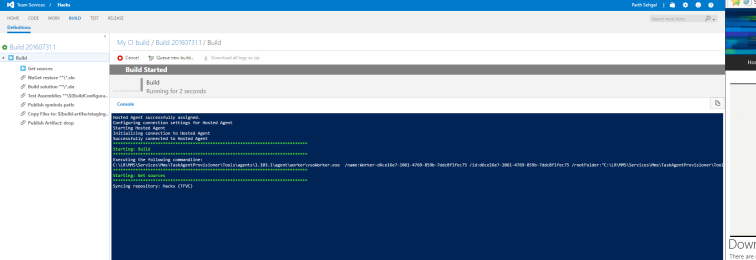
Your team now has a CI build to validate every change checked into your codebase!
Setting up the Release
- Before you can set up your release, you’ll need to add a server endpoint in case your deployment need integration to another service (like Azure), which it almost always will. Here is a video where Donovan Brown (the DevOps Guru in Microsoft) talks about service endpoints.https://channel9.msdn.com/Series/DevOps-Release-Management/Service-Endpoints-with-Visual-Studio-Team-Services/player
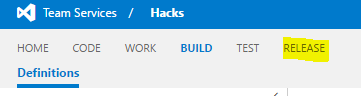
- Now, navigate to you Team Project and click on “Release” on the top navigation menu.
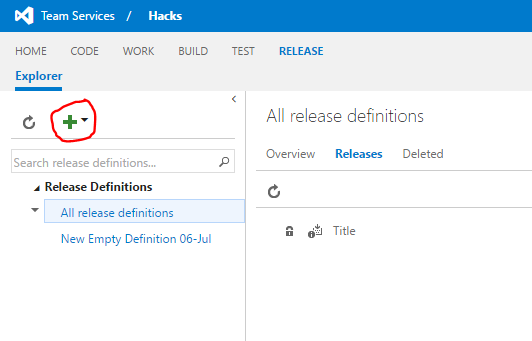
- Click on “+” and click “Create a new release”.
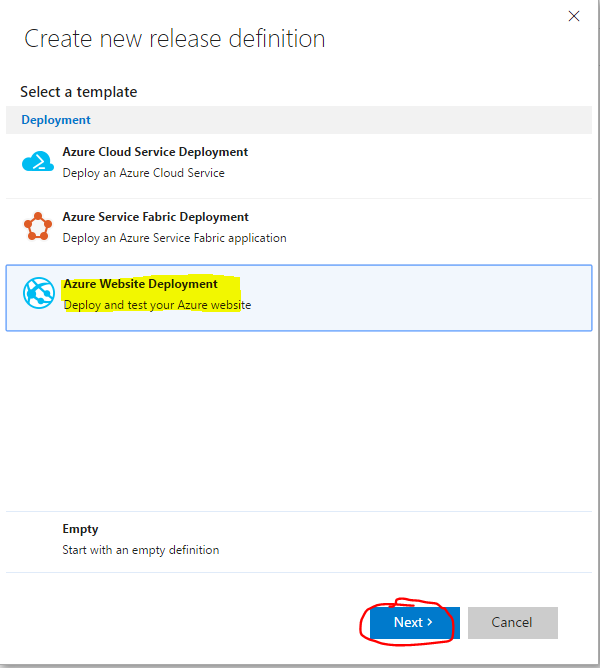
- Select the “Azure Website Deployment” Template. Then click Next.
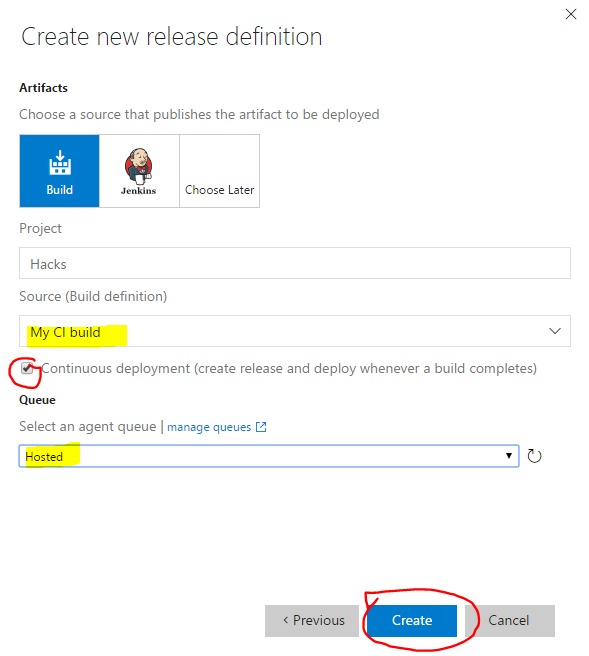
- Select the build that you created earlier as the source and tick the CD checkbox. Select The queue as “Hosted” and click create.
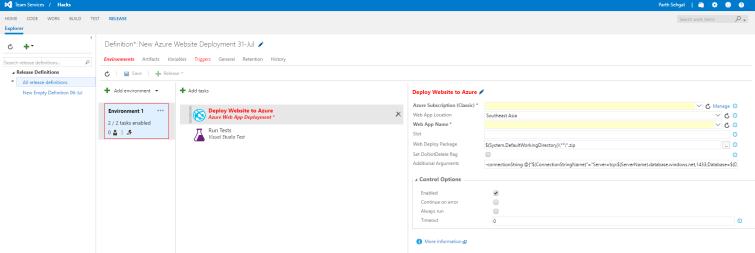
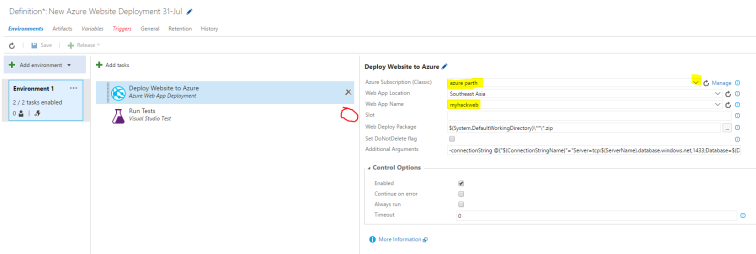
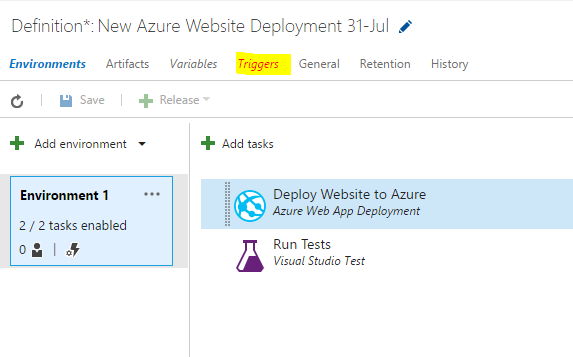
- Now you can see the various steps in the CD process. Configure the web app deployment by filling out the details. Select the subscription service endpoint created earlier in step one, as well as the existing or new web app. For existing web app, click the drop down menu and for a new web app, simply time in the new name. Lets delete the test task as we will cover that in a different post.
- Edit the name of the Release by clicking on the edit icon.

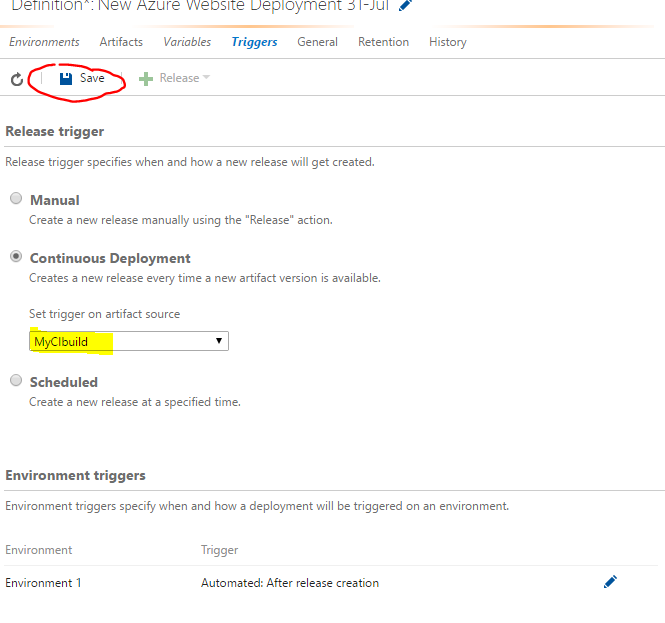
- Now click on the “Triggers” tab to configure the trigger point of our release.
- You can select it to trigger every time a build is triggered, by selecting continuous Deployment radio button. Alternatively, you can make it scheduled or manual.Finally click on Save.
And you are done! Now every time you check in your code, it will be automatically integrated into the build and deployed to azure!
